
Nothing says fall like the changing colours of the leaves and the crispness in the air mingling with the warm autumn spices of the kitchen. Cinnamon and nutmeg, dancing with clove and what better combination than pumpkin pie!
Over the last year I have enjoyed combining favourite baking treat flavours with marshmallows and testing them on my willing guinea pigs at work.

Pumpkin Pie Marshmallow Recipe
Pumpkin Layer
Bloom:
2/3 cup of canned pumpkin
1/2 tsp of ground cinnamon
1/2 tsp of ground ginger
1/4 tsp of ground nutmeg
1/4 tsp of all spice
3 packages of gelatine (3 tbsp)
Syrup:
1 1/2 cup of sugar
1 cup of white corn syrup
3/4 cup of water
Whipped Cream/Vanilla Layer
Bloom:
2/3 cup of cold water
1 tbsp of vanilla extract
1/2 tsp of cinnamon
4 packages of gelatine (4 tbsp)
Syrup:
1 1/2 cup of sugar
1 cup of white corn syrup
3/4 cup of water
1 tsp of vanilla
Equipment:
stand mixer
candy thermometer
metal or glass pan (8 x 13)
spray for greasing the pan
cornstarch and powdered sugar or icing sugar for dusting
graham cracker crumbs (optional)
If you'd like a little added crunch for nibbling the mallows, roll them in graham cracker crumbs. I've done this with Strawberry shortcake mallows and they are fantastic. It's a nice little flavoured addition to the treat.

Enjoy!
Pumpkin Layer
Bloom:
2/3 cup of canned pumpkin
1/2 tsp of ground cinnamon
1/2 tsp of ground ginger
1/4 tsp of ground nutmeg
1/4 tsp of all spice
3 packages of gelatine (3 tbsp)
Syrup:
1 1/2 cup of sugar
1 cup of white corn syrup
3/4 cup of water
Whipped Cream/Vanilla Layer
Bloom:
2/3 cup of cold water
1 tbsp of vanilla extract
1/2 tsp of cinnamon
4 packages of gelatine (4 tbsp)
Syrup:
1 1/2 cup of sugar
1 cup of white corn syrup
3/4 cup of water
1 tsp of vanilla
Equipment:
stand mixer
candy thermometer
metal or glass pan (8 x 13)
spray for greasing the pan
cornstarch and powdered sugar or icing sugar for dusting
graham cracker crumbs (optional)
Making the Marshmallows:
1) Lightly grease pan ( i prefer a pyrex glass pan) with spray - I like to wipe down the pan lightly with a paper towel to wipe off any pooling and spread the grease evenly to coat the pan.
2) Start with the Pumpkin Layer - add ingredients to large stand mixer bowl and sprinkle gelatine over top. Set aside.
3) In a large 4 quart pan, add Syrup ingredients and stir over medium heat until all the sugar has dissolved. Place candy thermometer in pan and turn up the heat to high. Let it bubble until the liquid reaches 240 degrees or the soft candy stage. Remove from heat.
4) Place a splash guard on the mixer and turn on low, stirring the bloom together. Slowly pour in the syrup mixture and mix on 3 or 4 until mixed and you can increase the speed without too much splashing.
5) Increase the speed to 6 or 7. At this point you should be able to remove the guard and allow the stand mixer to do its thing and beat the air into the candy. This should take about 12 minutes.
6) The mixture will start to resemble gooey marshmallow fluff. After about 12 minutes, it should be thick but still run. Using a greased spatula, pour out the marshmallow layer into the greased pan. Set aside.
7) Repeat steps 2 through 5 with the vanilla layer. Pour on top of the pumpkin layer. Cover with aluminum foil lightly so nothing can drop into the marshmallow and set aside for 8 hours.
Cutting the Mallows:
1) Mix half a cup of cornstarch with half a cup of icing sugar. This will be for dusting.
2) Place silicone mats or wax paper down on a counter and lightly coat with the dusting mixture. Remove covering from pan and lightly coat with dusting mixture.
3) Using your finger tips, lightly pull marshmallow away from edges from pan. If greased well, this will be easy and you will feel it pull away from the sides. Turning the pan upside down, continue to pull one side of the mallow away to let it drop on the dusted surface. Out comes the slab of mallow ready to cut and you will smell that pumpkin pie immediately!
4) With a greased knife, cut into desired squares, sampling a few as you go. I like to cut a row and then roll in the dusting mixture, shaking it off a bit and placing in an air tight container to be saved for later for gifts, or cocoa.
If you'd like a little added crunch for nibbling the mallows, roll them in graham cracker crumbs. I've done this with Strawberry shortcake mallows and they are fantastic. It's a nice little flavoured addition to the treat.
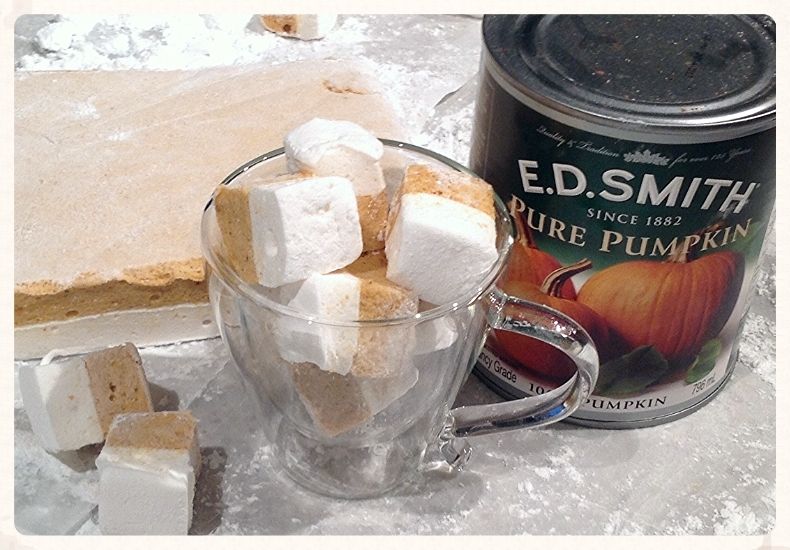
And now you have gluten free - dairy free pumpkin pie in a ooey, gooey, squishy, fluffy marshmallow bite.

Enjoy!