Tuesday 10 December 2013

Super Easy Christmas Rum Balls


With all of the baking going on for friend's baby showers, and their little one's birthdays, it has been busy days around the house. I wanted to post a holiday treat that i've quickly put together for this 2013 holidays. 

Funnily enough this recipe is actually adapted from The Gasparilla Cookbook, one that has been passed down to me and was printed in 1961. I'm guessing it doesn't matter what year it is, or what time of year it is, having an easy to do recipe is always good to have around.


Originally called Christmas Bourbon balls, they called for 2.5 cups of vanilla wafers. I have come across a few rum ball recipes using old brownies or cake and thought I could use my the extra cake I had baked for one of the birthdays. (when making a layer cake, it's always good to have a few extra layers on hand...just ..in...case).

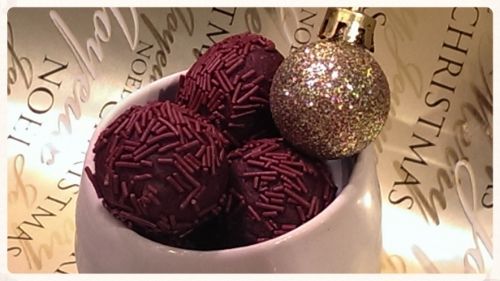
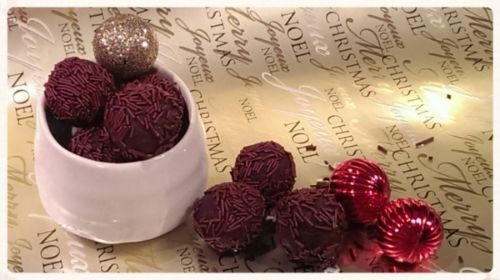
Any-who, I chose to make the adjustment and below is the recipe for these super easy Christmas rum balls. 


Christmas Rum Balls (adapted from Gasparilla Cookbook, recipe by Mrs. A.L. Brady)

Ingredients: 
2 1/2 cups of crumbled vanilla cake (a box of good ol' Betty Crocker or Duncan Hines will do the trick)
1 package of dark chocolate chips
2 tbsp of white corn syrup
1/2 cup of rum (i used a spiced rum)
1 cup of chopped nuts (i used half walnuts, half almonds)
1/2 cup of powdered sugar
1/4 cup of chocolate vermicelli*, sprinkles, non perils**, or jimmies

1) Make the cake as directed on the box. Or, if using your own recipe, crumble up 2.5 cups worth, which was roughly two 9 inch rounds.
2) Melt chocolate over warm water in a bowl, or in a microwave on low heat. 
3) Add corn syrup to melted chocolate and mix. 
4) Add rum, mix thoroughly. Depending on how warm your chocolate is, it may seize with the addition of the rum. If so, don't worry, pour the mixture into the cake crumbs and mix it all together. 
5) Let the chocolate rum mixture cool. You now have the choice of making these rum balls immediately or waiting for them to soak up that goodness. If making ahead, store these in the refrigerator or in a cold dark place for a week before moving on to step 6.
6) When ready, scoop the mixture into small balls. I prefer mine roughly an inch round or slightly smaller and roll in vermicelli in a small bowl. 
7) Chill and serve, or enjoy immediately.


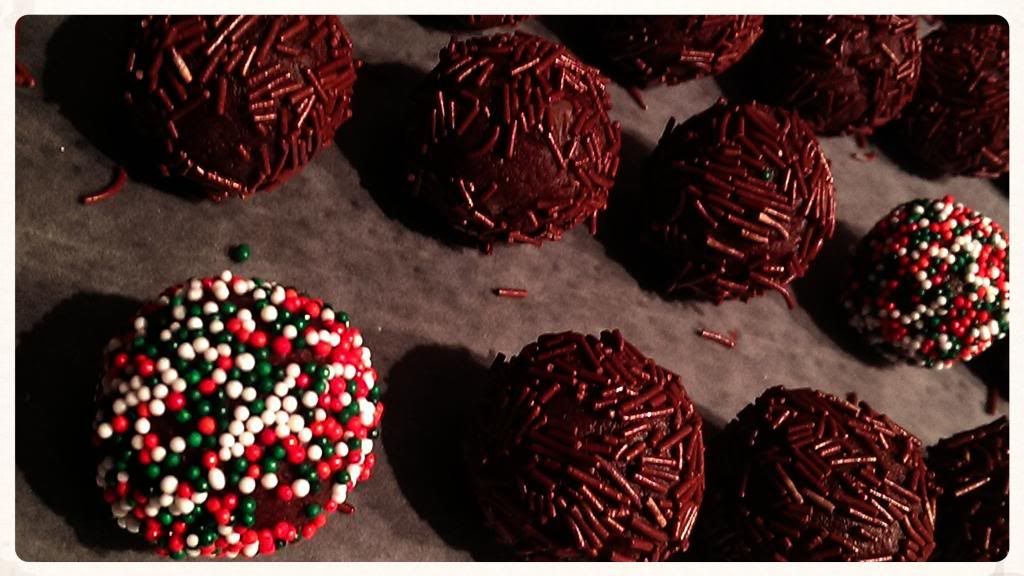
*Vermicelli sprinkles are thinner in size then jimmies and tend to stick to the rum balls a little better than the jimmies. Both will work and you will find if your hands are slightly warm, it will melt the chocolate a bit and the sprinkles will stick a bit better.
** A little trick i learned with the non perils. As they have a habit of bouncing out of the bowl faster than you can fill, use the cap of the sprinkle jar against the sprinkle jar to pour several in and then slowly pour them out of the cap into the bowl. You will hold onto a lot more non perils that way!

Rum balls are the perfect chocolatey festive treat for the few weeks around Christmas to help us wind down and enjoy the fun. Hope this treat ends up on your baking list this holiday season!


Sunday 8 December 2013

Mini Peppermint Mocha Christmas Marshmallow Cupcakes


So I'm still trying to get the hang of this whole 'blog posting' thing and with Christmas on its way, it's been a bit busy around the house. (in other words, the house is slowly being covered with icing sugar!).  In order to  catch up on the posting, here's another one from my 2012 baking collection and they were an absolute hit - not to mention cute too! 


These Mini Peppermint Mocha Marshmallow Cupcake darlings are a little more time consuming then the regular marshmallows I usually make, but being festive and fun, they were more than worth the effort. There are a few steps to making these and I've outlined them below. 

Mini Peppermint Mocha Marshmallows (mini marllowcakes?) with a Chocolate Surprise

Mocha Layer
Bloom: 
2/3 cup water
3 tbsp of cocoa
1 tbsp of instant coffee
3 packages of gelatine (3 tbsp)  
Syrup:
1 1/2 cup of sugar
1 cup of white corn syrup
3/4 cup of water

Peppermint Layer
Bloom: 
2/3 cup of cold water
1 tbsp of peppermint extract
4 packages of gelatine (4 tbsp)  
Syrup:
1 1/2 cup of sugar
1 cup of white corn syrup
3/4 cup of water

Chocolate Ganache Centre (optional)
1/3 cup of heavy cream (whipping cream not whipped)
4 oz of dark chocolate (50-60%)

Equipment:
stand mixer
candy thermometer
mini muffin tins (x2)  OR metal or glass pan (8 x 13) 
piping bags
small sauce pan
spray for greasing the pan
cornstarch and powdered sugar or icing sugar for dusting
crushed candy canes (optional) 


Making the Chocolate Centers (optional):

1) In a small saucepan, heat heavy cream over medium heat until simmering but not boiling.
2) Remove the saucepan from heat and add the dark chocolate. Let sit for 30-60 seconds and stir chocolate and cream together until fully combined. Set aside.
 
Making the Marshmallows:
1) Lightly grease the mini muffin tins. (if you  choose to just make the layers and cut into cubes, use a glass or metal pan) with spray -  wipe each cup so there's no excess grease.
2) Start with the Mocha Layer - add ingredients to large stand mixer bowl and sprinkle gelatine over top. Set aside.
3) In a large 4 quart pan, add Syrup ingredients and stir over medium heat until all the sugar has dissolved.  Place candy thermometer in pan and turn up the heat to high. Let it bubble until the liquid reaches 240 degrees or the soft candy stage. Remove from heat.
4) Place a splash guard on the mixer and turn on low, stirring the bloom together. Slowly pour in the syrup mixture and mix on 3 or 4 until mixed and you can increase the speed without too much splashing.
5) Increase the speed to 6 or 7. At this point you should be able to remove the guard and allow the stand mixer to do its thing and beat the air into the candy. This should take about 12 minutes. 
6) The mixture will start to resemble gooey marshmallow fluff. After about 12 minutes, it should be thick but still run. Using a greased spatula, fill a large pastry bag. For mallow piping i find the larger 16" cotton bags the best as they are lined and much easier to clean after the mess. 
7) Pipe each mini muffin cup half full with the mocha mixture. If you have any excess, fill a small greased loaf pan. (you can have extras for later that you can add to your coffee or cocoa!)
8) Now we can take our set aside, slightly cooled ganache and fill a piping bag. use a small round open tip or cut a cm opening on the end and pipe a small dab onto the centre of each mocha layer mallow. 
9) Repeat steps 2 through 7 with the peppermint layer and pipe on top of the mocha and ganache layers in each of the muffin cups. To create that 'icing' swirl, when piping the peppermint layer, start on the outside of each cup and move inwards, pulling away when you get to the centre. 
Decorate the tops of the mini mallowcakes with crushed candy canes, or sprinkles as you choose. Set aside overnight or for close to 8 hours covering with tented aluminum foil so nothing can drop into the mallows.
When ready, dust lightly with the cornstarch/powder sugar mixture and remove from tins. If sticking, grease a small knife and run around edges. Pop them out, and enjoy!

I will try and make another version of these for 2013, remembering to take pictures along the way. Sooner or later I will get the hang of all this, but for now, enjoy the treats!


Christmas Eggnog Meringue Kisses


Christmas music in the stores, festive mugs at the coffee shops, it's time for holiday baking!

Last year i made these cute little Eggnog meringues and I've finally got this blog up and running so i can share the little morsels with you. They are sweet with winter spice and melt in your mouth for those sugary moments.

Christmas Eggnog Meringue Kisses
Ingredients:
4 egg whites at room temperature
1 cup of sugar
1 tsp of rum emulsion *
1/2 tsp of nutmeg
pinch of cream of tartar 
cinnamon for dusting

Equipment:
stand mixer
baking sheets
sifter
parchment paper 
piping bag with star tip or your choice

*through my baking i've found the use of emulsions incredibly useful and powerful when it comes to incorporating flavours. I use a variety of Lorann emulsions which I keep stocked in my pantry.

 1) Preheat oven to 200 and prep the baking sheets with parchment paper. -  parchment paper helps keep the meringues dry and wicks away the moisture that we are trying to bake out of the meringue when it's in the oven.
2) Sift together sugar and nutmeg, mixing thoroughly. Place egg whites in mixing bowl and mix until frothy. Gradually add the sugar to the frothy mixture and add a pinch of cream of tartar.
3) Continue beating egg whites until stiff peaks are formed. You can test this by pulling the beater out of the egg whites. If the peak stays - the meringue is ready.
4) Fill pastry bag fitted with chosen star tip. I chose a closed star tip for this - Wilton 2D. Depending on how large you want your meringue kisses you can pipe more or less meringue onto the sheet.
5) Holding the piping bag 90 degrees to the baking sheet and just 3/4 inch away, squeeze the bag piping out a kiss to the preferred size. Release the squeeze from the bag and pull away forming the tip of the kiss. Continue piping until the sheet is full. Meringues do not spread much when beaten to stiff peaks, so minimal space between the kisses are required.


6) Place baking sheets in oven for 1 and half hours. When done, peaks will be firm to the tough and will move off the parchment easily. If the meringues begin to brown, leave the oven door open while the completing the remaining cooking time.
7) Dust the meringues with cinnamon for an added festive touch.


Remove meringues from parchment and enjoy! Try to save a few for friends or as gifts. These are fantastic cookie exchange treats because they make so many little treats in one go. 

I'm not a true fan of eggnog, but these little bites carry the flavours of the festive drink without the thick heavy nog itself.

Happy Baking!


Thursday 21 November 2013

Pumpkin Pie Marshmallows (gluten and dairy free)


Nothing says fall like the changing colours of the leaves and the crispness in the air mingling with the warm autumn spices of the kitchen. Cinnamon and nutmeg, dancing with clove and what better combination than pumpkin pie!

Over the last year I have enjoyed combining favourite baking treat flavours with marshmallows and testing them on my willing guinea pigs at work. 

These turned out fluffy, squishy, light and with the perfect pumpkin melt in your mouth moment.


Pumpkin Pie Marshmallow Recipe

Pumpkin Layer
Bloom: 
2/3 cup of canned pumpkin
1/2 tsp of ground cinnamon 
1/2 tsp of ground ginger
1/4 tsp of ground nutmeg 
1/4 tsp of all spice
3 packages of gelatine (3 tbsp)  
Syrup:
1 1/2 cup of sugar
1 cup of white corn syrup
3/4 cup of water

Whipped Cream/Vanilla Layer
Bloom: 
2/3 cup of cold water
1 tbsp of vanilla extract 
1/2 tsp of cinnamon 
4 packages of gelatine (4 tbsp)  
Syrup:
1 1/2 cup of sugar
1 cup of white corn syrup
3/4 cup of water
1 tsp of vanilla

Equipment:
stand mixer
candy thermometer
metal or glass pan (8 x 13) 
spray for greasing the pan
cornstarch and powdered sugar or icing sugar for dusting
graham cracker crumbs (optional)


Making the Marshmallows:
1) Lightly grease pan ( i prefer a pyrex glass pan) with spray -  I like to wipe down the pan lightly with a paper towel to wipe off any pooling and spread the grease evenly to coat the pan.
2) Start with the Pumpkin Layer - add ingredients to large stand mixer bowl and sprinkle gelatine over top. Set aside.
3) In a large 4 quart pan, add Syrup ingredients and stir over medium heat until all the sugar has dissolved.  Place candy thermometer in pan and turn up the heat to high. Let it bubble until the liquid reaches 240 degrees or the soft candy stage. Remove from heat.
4) Place a splash guard on the mixer and turn on low, stirring the bloom together. Slowly pour in the syrup mixture and mix on 3 or 4 until mixed and you can increase the speed without too much splashing.
5) Increase the speed to 6 or 7. At this point you should be able to remove the guard and allow the stand mixer to do its thing and beat the air into the candy. This should take about 12 minutes. 
6) The mixture will start to resemble gooey marshmallow fluff. After about 12 minutes, it should be thick but still run. Using a greased spatula, pour out the marshmallow layer into the greased pan. Set aside. 
7) Repeat steps 2 through 5 with the vanilla layer. Pour on top of the pumpkin layer. Cover with aluminum foil lightly so nothing can drop into the marshmallow and set aside for 8 hours. 

Cutting the Mallows:
1)  Mix half a cup of cornstarch with half a cup of icing sugar. This will be for dusting.
2) Place silicone mats or wax paper down on a counter and lightly coat with the dusting mixture. Remove covering from pan and lightly coat with dusting mixture.
3) Using your finger tips, lightly pull marshmallow away from edges from pan. If greased well, this will be easy and you will feel it pull away from the sides. Turning the pan upside down, continue to pull one side of the mallow away to let it drop on the dusted surface. Out comes the slab of mallow ready to cut and you will smell that pumpkin pie immediately! 
4) With a greased knife, cut into desired squares, sampling a few as you go. I like to cut a row and then roll in the dusting mixture, shaking it off a bit and placing in an air tight container to be saved for later for gifts, or cocoa.

If you'd like a little added crunch for nibbling the mallows, roll them in graham cracker crumbs. I've done this with Strawberry shortcake mallows and they are fantastic. It's a nice little flavoured addition to the treat.

And now you have gluten free - dairy free pumpkin pie in a ooey, gooey, squishy, fluffy marshmallow bite.


Enjoy!

Related Posts Plugin for WordPress, Blogger...